Well, I spent all day Saturday fairing (shaping to an effective and pleasing form) the port chine logs and sheer clamp. And then Devy and I got busy cutting plywood sheets!
This was not nearly as difficult as I expected. Devy held the plywood sheets in place while I adjusted their positions and set clamps. We drew a few lines along the chine and cut to shape. These panels had no curves sharp enough to prevent the use of our circular saw, so zip! and they're done. Well, almost. Some trimming will happen as we put things into their final position and some trimming will be done after everything is permanently fastened.
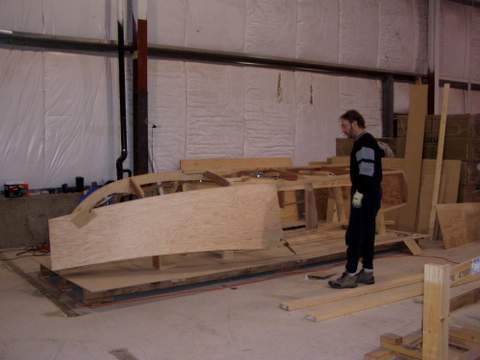
Here, Devy caught me trying to decide whether we had a good position on the bow sheet. I felt pretty good about it, so I marked the lines and cut.
So, with the bow piece cut, we clamped both the panels into place for a quick look at how things will go together. There is still a bit of trimming to be done where the two sheets meet, and we'll also have to put a backing piece in place to stabilize the joint. There is also a bit of trimming to do at the stem (the extreme forward end, to the left in this shot) to finish up the final shape. That will be done after the sheet is permanently affixed.
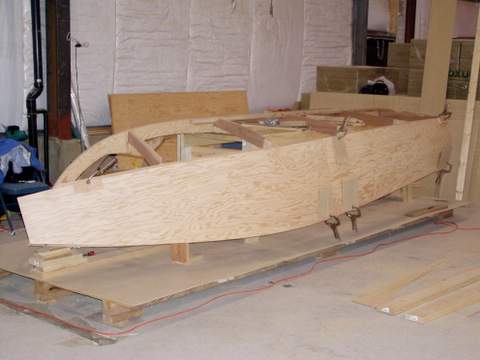
And here is a view from the bow. I was surprised at how easily the plywood took the curves, but I guess that's all part of the designer's job. Everything I've read suggests that the bottom sheet at the bow end will be a bit trickier. I wouldn't be surprised--not only is there a kind of nasty curve (actually a compound curve!), but the bottom plywood is 3/8 inch instead of the 1/4 inch used on the sides. After we took this shot, we unclamped and transferred the sheets over to the other side to test fit them there. Lo and behold, they fit, so we were able to simply use them as templates to cut the other side.